This blog is no longer hosted on this site. Check out the new and improved Domestic360 at domestic360life.com for even more DIYs, recipes, and fashion tips!

Saturday, October 6, 2012

Wheat-Free Maple Sausage and Cheese Oatmeal Sandwiches

I love those (totally processes, fat-filled, sugary, fake, and all around unhealthy) Sausage McGriddles with cheese from McD's. For some reason the sweet from the maple syrup and the salty from the cheese mixes so well. However, I am trying to be healthier and thrifty. So, I came up with these (still fattening, but oh so yummy) Wheat-Free Maple Sausage and Cheese Oatmeal Sandwiches.

I made oatmeal for breakfast a few days ago and stuck the leftovers (there seems to always be leftover oatmeal) in the fridge. Found a blog post  about using leftover oatmeal to make pancake like fritters. I changes up the recipe and the little cakes turned out wonderfully. They are really good just on their own, but add the sausage and cheese patties and you have a breakfast fit for cool fall weather. Almost enough to make me want to live in a tiny cabin in the woods where I could sit outside, wrapped in a blanket, and watch the leaves change while drinking hot coffee and munching on these beauties.


Wheat-Free Maple Sausage and Cheese Oatmeal Sandwiches

Oatmeal Cakes
  • About 3 cups leftover oatmeal (I used Irish steel cut oats
  • Two eggs
  • 1 cup gluten-free all-purpose flour (divided)
  • 1/2 teaspoon vanilla
  • Raisins (optional. I had cooked my oatmeal with the raisins, so they were already in with the leftovers)
  • Butter for cooking
Mix everything (except the butter) together in a large bowl. Melt the butter in a skillet over medium heat. Scoop the batter into the skillet and cook until crispy and golden brown on each side. 

NOTE: Because this recipe uses leftover oatmeal, 3 cups is not an exact measurement. I am estimating that is about how much I used. To make sure you get the proportions right, add one egg at a time and 1/2 cup of flour at a time. Your mix should resemble a very lumpy (because of the oatmeal) thick pancake batter. If the egg-flour ratio isn't right the cakes will fall apart when you try to flip them. No worries though, just adjust the ratios before cooking the next cake.

Maple Sausage and Cheese Patties
  • 1 lb. sausage (the kind that comes in a tube, like Jimmy Deans)
  • 1 and 3/4 cup shredded sharp yellow cheddar cheese (or one brick Cracker Barrel cheese)
  • 1 cup gluten-free all-purpose flour
  • 1/4 cup brown sugar
  • 3 tablespoons pure maple syrup 
Preheat oven to 350F and spray a cookie sheet with cooking oil. Mix everything together in a large bowl, I used my hands to make sure everything came together completely. Spray a skillet with cooking oil or use a non-stick pan. Form patties with your hands and cook them over medium heat until each side is golden brown and crispy. Transfer the patties to the cookie sheet and finish cooking them in the oven for about 7-10 minutes, or just until they are cooked (no pink) all the way through.

Assemble the sandwiches by stacking a oatmeal cake and then a sausage patty and then another oatmeal cake. Serve with maple syrup hot. These are also great at room temp or cold!


If you don't care about being wheat-free then just use regular all-purpose flour.

One more thing. I hate eggs (like they turn my stomach in the worst way kind of hate), but I am sure if you like eggs these sandwiches would be great with an egg (over easy/over hard) in the middle. The sausage patties would also be awesome on an English Muffin! 

Friday, September 14, 2012

Pin Me!

red pinterest logoCheck E&A and Coco on Pinterest!

Beach House Cooking and Crock Pot Cinnamon Nuggets

Vacation!


We haven't have a family vacation since before we got married. Its been forever. Needless to say, we had been looking forward to this trip for quite some time.

Me and my husband love the beach. I wish we could move to a beach town (Savannah anyone?) and just live. If both our jobs didn't depend on cities, and if we could convince our families to relocate with us, I think we would move in a heartbeat. As it is, we will have to enjoy our liitle beach trips when we can get them.

One of the great things about family beach trips is the house. Everyone under one roof, for a whole week, eating together, laughing, screaming (kids and parents at kids), wispering in your room when you need to have a private conversation, etc... Its great.

Learning to live with people you grew up with, plus their spouces and kids, is such a weird experience. One of the places this weirdness is really prominate is the kitchen. Cooking in a beach house kitchen is a weird exerience to begin with. You are totally unformillar with the layout (took me three days to find a spatcula); there are is weird assortment of utencils and equipment; you have to bring your whole spice rack just incase you might have a craving for something that requires marjrom.

Crock pot cooking is the very best at the beach. Fix it, leave it, come home to a totally done meal. I love doing that at home, and its even better at the beach. After a long day in the sun and sand the last thing I want to do is cook a full dinner.  


When I think of crock pot cooking I don't ever think of breakfast. However there are really great breakfast options that can be made in the crock pot. Oatmeal can be put in overnight and is really great in the morning, and there are egg cassirols that are (reportably) yummy too.


When it comes to breakfast I love a pastry and a good cup of coffee. This year I wanted to make a round of cinnamon rolls, however I didn't want to do the work. So, I did a bit of recipe research and came up with these Crock Pot Cinnamon Nuggets. Cinnamony goodness, gooey, sugery, unhealthy, vacation food.


The only issue I found with this recipe is that it takes longer to cook than I would have liked for breakfast. I woke up early to put everything together in the crock pot and then we still had to wait three hours to eat. It turned out to be more of a brunch food item, but no complants here! Plus the house smelled amaaazing while it cooked.


Cinnamon Nuggets


  • 1 cup white sugar
  • 2 tablespoon ground cinnamon
  • 3 cans refridgerated homestyle buiscuits (this recipe would work with one can of buiscuits too)
  • 1/2 cup butter (1 stick)
  • 1/2 cup brown sugar
  • 1 teaspoon vanilla
  • pecan or walnut pieces (optional)
  • raisins (optional)
In a large zipper bag shake up the sugar and cinnamon to mix well. Cut the buiscuits into quarters with scissors. Dump the buiscuits pieces into the zipper bag and shake to coat. This is the perfect thing for helpful little hands, have a shaking dance party! Dump the contence of the zipper bag into a large crock pot. Mix in the nut pieces and raisons.

Melt the butter in a sauce pot on the stove, add the brown sugar and vanilla. Stir until combined. Pour this mixture over the nuggets in the crock pot. Place a paper towel (to catch the condensation) on top of the crockpot and then put to lid on. Cook for two to four hours on low.

Glaze


  • 1 1/3 cups powdered sugar
  • 2 tablespoons milk (may need more to reach desired consistancy)
Stir together ingredents until combined. Drizzle glaze over nuggets when they are done cooking. 

Notes:
I think these could be cooked in a glass cake pand in the oven (350 for about 30mins?). I also think using cream cheese icing would be great too. It seemed like the nuggets on the edges of the crock pot cooked much more quickly while the nuggets in the center were still gooey, not sure how to fix this.

Sunday, August 26, 2012

Kiwi Coasters (Tutorial and Pattern!)

I believe inspiration comes from anywhere and everywhere. 

I love Molly's Sketchbook from the brilliance of The Purl Bee.

I love the little projects. They are so sweet and often have just enough quirk to make me feel funky. I am all over little kitschy projects that make my home mine. These kiwi coasters were inspired by the Apple and Citrus Coasters from Molly's Sketchbook.

My Kiwi Coasters are a really quick and simple project to add some fun to your  day to day life. I made six coasters, but you can make as many or as few as you like. Each coaster takes about 30 mins from start to finish. So, try wipping up some great little Kiwis for your drinks to rest on.


Kiwi Coasters
What you will need:
(this tutorial is for 6 coasters)

  • 3 sheets of brown felt
  • 2 sheets of green felt
  • Lime green embroidery floss
  • Kelley green embroidery floss
  • Black embroidery floss
  • White embroidery floss
  • Brown embroidery floss
  • The Usual Stuff (hand embroidery needle, fabric scissors, paper scissors, straight pins, etc...)

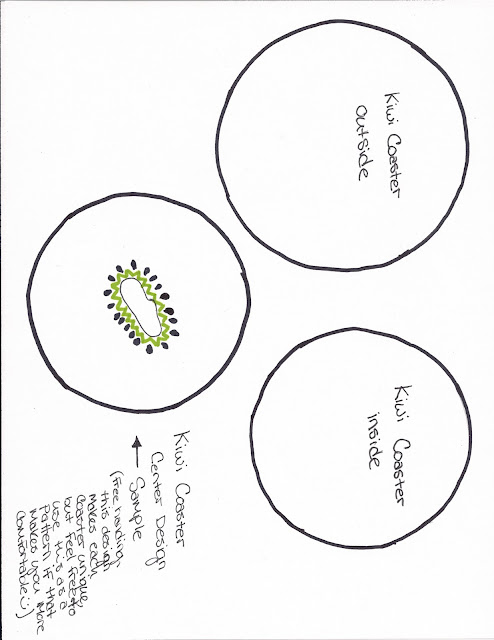
Cut out the circles according to the pattern (scroll down to the bottom of the post to find the pattern). For each coaster you will need two larger brown circles and one smaller green circle.

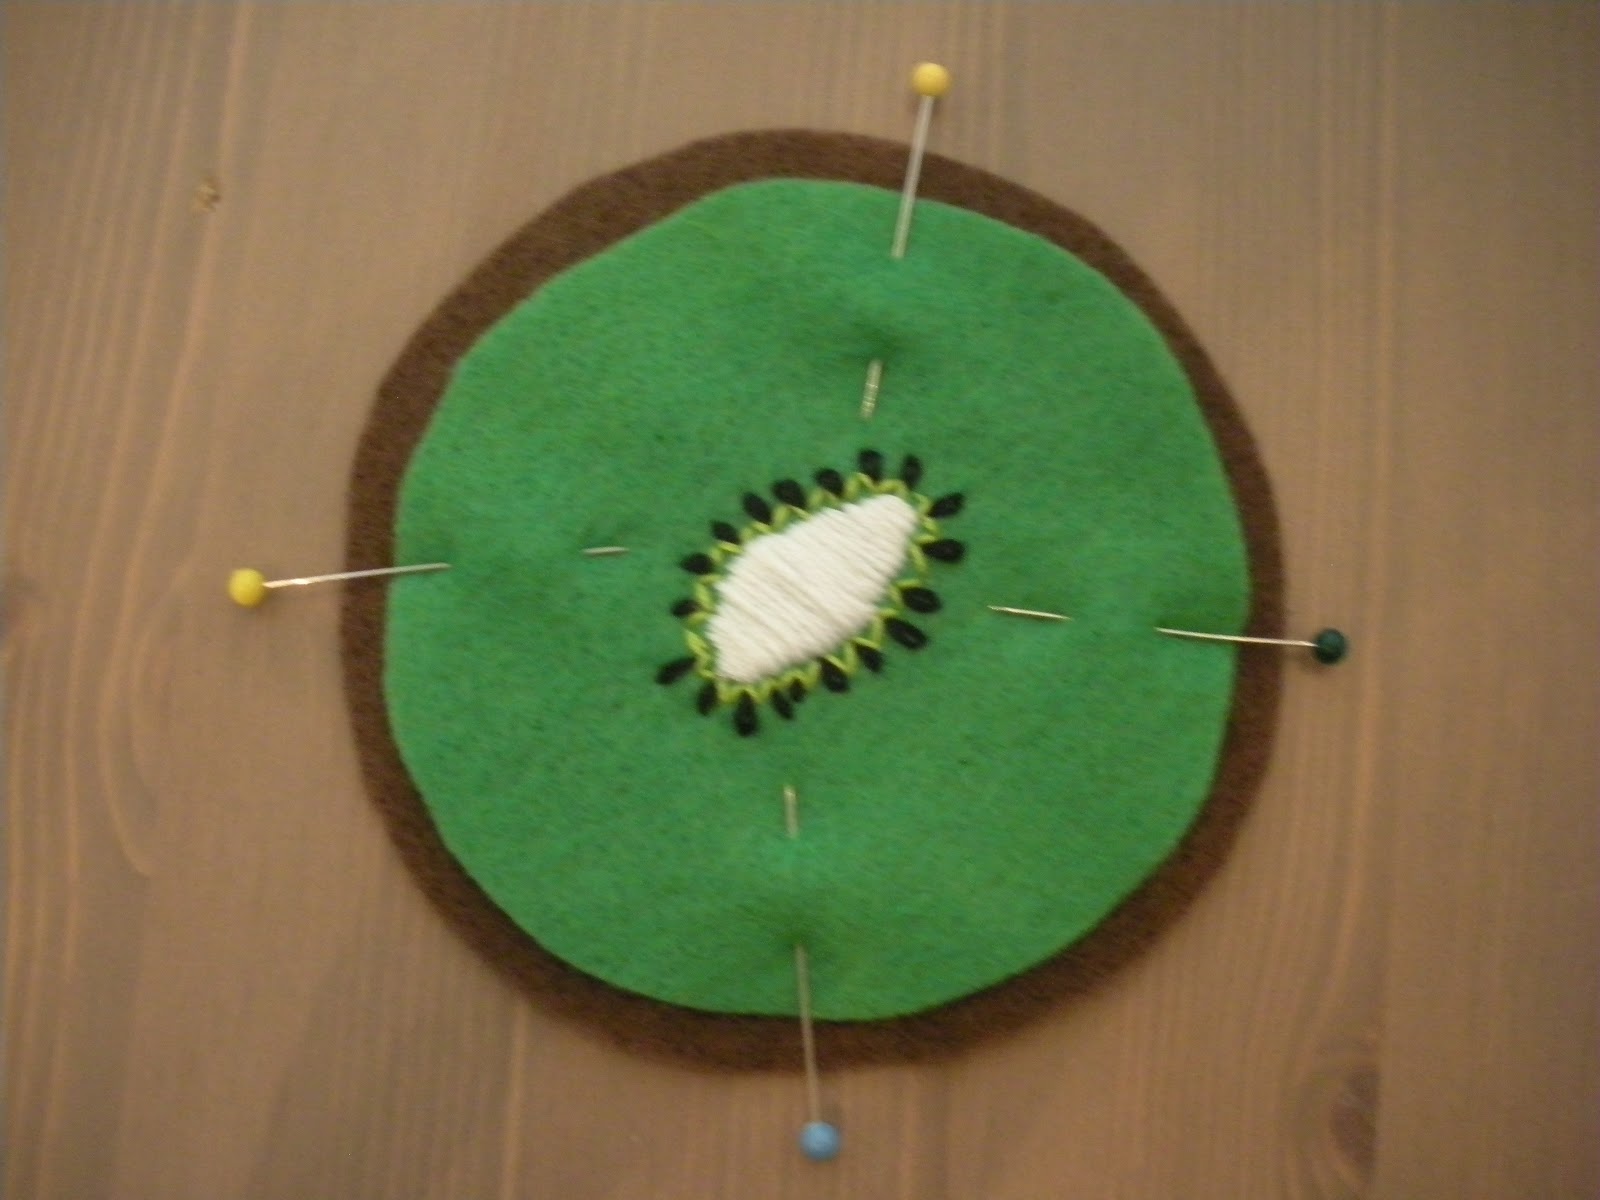
For the center of the kiwi use white embroidery floss and the satin stitch (check out this tutorial). Stitch a organic, kidney bean kinda shape in the middle of your green circle, I have drawn a guide for this on the pattern, but I think it looks great when all the centers are a little different. So, don't be scared to free-hand this!

With the lime green floss stitch little "V" shapes all around the center of the kiwi. Again, free-handing this gives it a great organic feel! 

Using the lazy daisy (tutorial) stitch little "seeds" in each of the V's you just created. 

Once your embroidery is all done, pin the green circle on top of one of the brown circles and pin in place.

Using the running stitch (tutorial), stitch around the perimeter of the green circle.

Pin the brown and green circles on top of the remaining brown circle. Starting from the inside stitch around the perimeter using the running stitch (tutorial).


Trim the edges so the brown circles are even. 


Here is the pattern. Print it out on a full sheet of paper.