This blog is no longer hosted on this site. Check out the new and improved Domestic360 at domestic360life.com for even more DIYs, recipes, and fashion tips!
Showing posts with label housewife. Show all posts

Sunday, August 26, 2012

Kiwi Coasters (Tutorial and Pattern!)

I believe inspiration comes from anywhere and everywhere. 

I love Molly's Sketchbook from the brilliance of The Purl Bee.

I love the little projects. They are so sweet and often have just enough quirk to make me feel funky. I am all over little kitschy projects that make my home mine. These kiwi coasters were inspired by the Apple and Citrus Coasters from Molly's Sketchbook.

My Kiwi Coasters are a really quick and simple project to add some fun to your  day to day life. I made six coasters, but you can make as many or as few as you like. Each coaster takes about 30 mins from start to finish. So, try wipping up some great little Kiwis for your drinks to rest on.


Kiwi Coasters
What you will need:
(this tutorial is for 6 coasters)

  • 3 sheets of brown felt
  • 2 sheets of green felt
  • Lime green embroidery floss
  • Kelley green embroidery floss
  • Black embroidery floss
  • White embroidery floss
  • Brown embroidery floss
  • The Usual Stuff (hand embroidery needle, fabric scissors, paper scissors, straight pins, etc...)

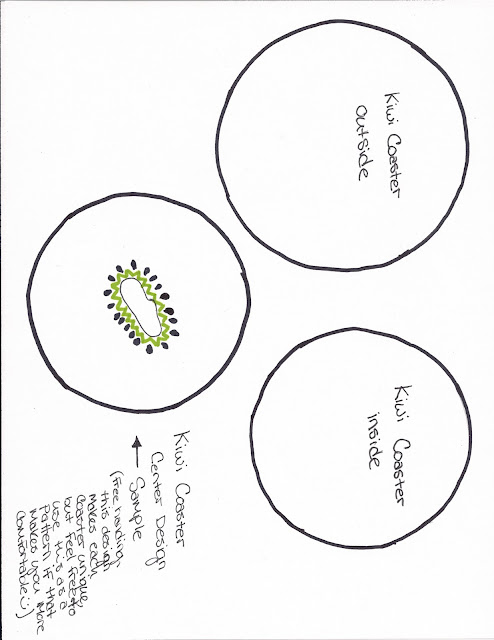
Cut out the circles according to the pattern (scroll down to the bottom of the post to find the pattern). For each coaster you will need two larger brown circles and one smaller green circle.

For the center of the kiwi use white embroidery floss and the satin stitch (check out this tutorial). Stitch a organic, kidney bean kinda shape in the middle of your green circle, I have drawn a guide for this on the pattern, but I think it looks great when all the centers are a little different. So, don't be scared to free-hand this!

With the lime green floss stitch little "V" shapes all around the center of the kiwi. Again, free-handing this gives it a great organic feel! 

Using the lazy daisy (tutorial) stitch little "seeds" in each of the V's you just created. 
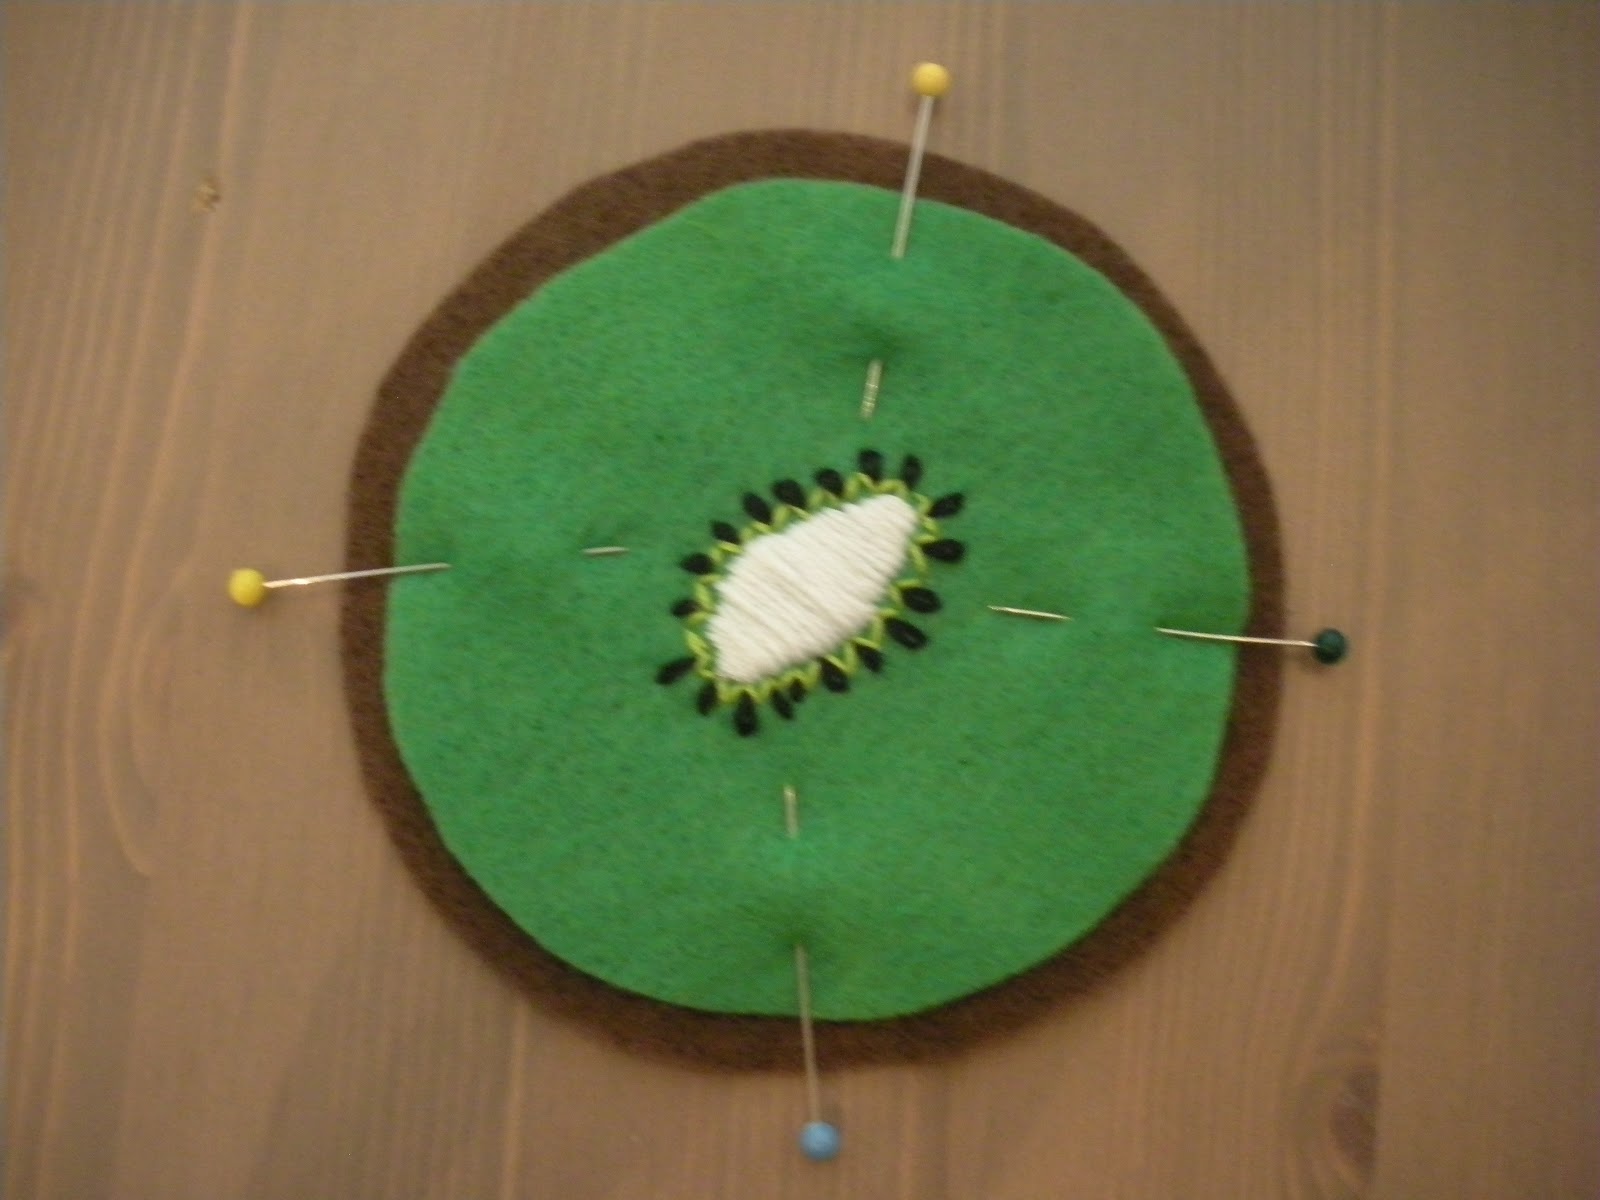
Once your embroidery is all done, pin the green circle on top of one of the brown circles and pin in place.

Using the running stitch (tutorial), stitch around the perimeter of the green circle.

Pin the brown and green circles on top of the remaining brown circle. Starting from the inside stitch around the perimeter using the running stitch (tutorial).


Trim the edges so the brown circles are even. 


Here is the pattern. Print it out on a full sheet of paper.


Monday, May 21, 2012

Diaper FAIL! (and how to fix it)

I love my son. I love being his mommy. I love almost everything that being a mommy brings to my life. 
One thing I do not love is the crazy amount of laundry I have to do on what seems like a daily basis. I especially do not love the nasty diaper explosions that just ruin his (and sometimes my) clothes. 

Since there is no handbook for new moms (if only!) I have had to do lots of on-the-job-training. This diaper fail thing is one of the many tricks I have picked up over the past eight months. 

Here is the before.
Pretty nasty, right?

Well, thankfully, I have experience with laundry.
I have learned a trick or two from my days of washing actors clothing for a living. Its relatively unbelievable what actors can do to a costume in the short amount of time that they actually wear the piece of clothing. Anyway, years of getting stains of blood, sweat, chocolate, hairspray, paint, etc... out of costumes overnight (in time for the next show) has taught me a thing or two. 

If you have ever tried to get poop stains out of your babies clothing you know how hard it is to really make it go away. Well here is your answer! I have even used this system on poop stains that are days old. I have done this so many times that I can pretty much guarantee it will work.


Step One: 
Rince the poop off the item of clothing.
(To be honest, sometimes I skip this step, but then there are poop flecks, eww, floating around the bucket.) 


Step Two:


Step Three:
Put a scoop of Oxi Clean Perfume and Dye Free Verstile Stain Remover in the bottom of a laundry bucket. Add enough hot water to swish around in the bucket and mix with the Oxi Clean. You want the powder to be totally disolved.  I use the Perfume and Dye Free Oxi Clean because my son has sensitive skin, but the other stuff works just as well.

Step Four:
Fill the bucket about 3/4 full with hot water, I usually do this in the bathtub.

Step Five:
Add your poopy (or stained) clothing. Stir the clothes into the solution with a wooden spoon (make sure you dedicate this spoon to laundry and it never gets put back in your kitchen) or with your hand.

Step Six:
Let sit for a few hours or over night. If you remember, give the solution a stir every once and awhile.

Step Seven:
Dump the whole solution and clothes into the washer with your normal load of baby clothes and normal detergent. Run it through whatever cycle you usually use for baby clothes, I always use hot/cold settings, and then dry like normal.


There you go! Thats it! 
Happy baby with clean clothes.  

This works super well for poop stains and I have used it to freshen up kitchen towels and other items around the house. Its a really easy way to keep your kids clothes looking nice and clean. 

NOTE: I have only tried this with breast milk poop, not sure how it would work with formula poop.