
Its really not very hard to make, and if I didn't have a baby who likes to be held 24/7 I could have made it in an hour or so. Anyway, here is the tutorial, enjoy!

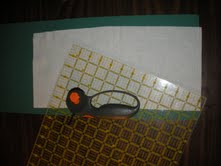
Supplies:
- Red, what and light blue thread
- White muslin
- Green quilting cotton (or other quilting fabric for lining)
- 3/8" grosgrain ribbon (there is a typo in the photograph... oops:)
- Brown felt
- Dark green felt
- Medium green felt
- Lime green felt
- Fabric glue
- Masking tape
- Fray Check or clear nail polish
- Pins, scissors, sewing machine, iron, tape measure (you know, the regular sewing stuff)
Cut out one piece of muslin at, 7"x15" and one piece of lining fabric, at 61/2”x15”.


Fold down 1/4" on both 7" ends of the muslin fabric. Press and pin. Stitch this down with white thread.

Attach two strips of 1” wide masking to each end of the muslin, lining the fist one up flush with the edge of the fold you just created, and the second piece flush with the first piece.

Using light blue thread, line up the edge of your foot with the edge of the masking tape and stitch a line all the way across the muslin. Do this again, lining the edge of your foot with the line of stitches you just created. Continue this until the whole piece of muslin is full of blue lines. Trim the threads. Press.

(My machine totally messed up the back of my fabric, creating tons of bobbin art. Usually this would really frustrate me, but since this stitching is for decoration only and there is a lining to cover it up, it didn't let bother me... this time.)
Line the long edge of the muslin with a piece of masking tape ½” from the edge. With red thread, stitch a line down the the fabric lining the edge of your foot up with the edge of the masking tape. You now have “notebook paper.”

Cut out different sized circles (they are cuter if they are a little lopsided and funky) out of the three different shades of green felt, and a tree trunk out of the brown felt. None of these shapes need to be perfect, they are supposed to mimic a child’s doodle.
Fold your notebook paper fabric in half, this will help you with the placement of your tree. Glue your tree in place.

With right sides together, pin the lining and the notebook paper together, the lining should lay right inside the folded down edges of the notebook paper fabric piece. Stitch all the way around, using the edge of foot edge of fabric measurement.

Now fold the fabric sandwich in half with the lining on the outside. Pin one side. On the other side, measure down ¾” from the top edge. Then use a piece of tailors chalk to mark a ¾” section, you will not sew this section closed. Pin this side as well, but make sure to mark the ¾” section that you won’t be sewing.
Using a ½” seam allowance, stitch up the sides of the bag with white thread, leaving the ¾” opening on one side. Press open the seam on the side with the opening. Stitch the seam allowance down around the opening, this is where your drawstring will be.
Using a ½” seam allowance, stitch up the sides of the bag with white thread, leaving the ¾” opening on one side. Press open the seam on the side with the opening. Stitch the seam allowance down around the opening, this is where your drawstring will be.

Fold down the top edge of the bag so that ¾” of the white muslin is folded over the lining. Press and pin. Stitch along the bottom edge of the white (edge of foot, edge of fabric), creating a casing.
Trim the corners of the bag and turn it right sides out.

Cut a piece of ribbon that is 24” long. If your ribbon is mostly synthetic, burn the ends, if it is mostly natural fibers then put some Fray Check or clear nail polish on the ends to keep them from coming apart. Attach a safety pin to one end of the ribbon and feed it through the ¾” hole you created.

Put some Fray Check/clear nail polish on the seams and you’re ready to fill your bag with treasures!

***NOTE***
You don’t have to use a tree, it could be a rainbow, or a flower, a name, or an ice cream cone. Its up to you!

I filled my sister’s bag with heart shaped crayons I made by using this tutorial. I can’t wait to send it to her, I just know she will love it.
Enjoy your bag! Please let me know if you make one, I would love to hear/see how yours turned out!
No comments:
Post a Comment