This blog is no longer hosted on this site. Check out the new and improved Domestic360 at domestic360life.com for even more DIYs, recipes, and fashion tips!
Showing posts with label stencil. Show all posts

Tuesday, October 30, 2012

Robot 1st Birthday Party (DIY installment)

About two weeks ago i spent a ton of time putting together this post. It was beautiful. Apparently  I wasn't signed in while I was creating the post so it didn't save and when my son unplugged the computer I lost everything I had done. I got so fed up with the whole thing that I just resigned myself to not posting my links and recipes. Needless to say, I changed my mind. So, here are all the secrets behind my son's first birthday party, now you can host your own fool-proof Robot Birthday Party!

Invitations
I just made a stencil (check out my tutorial here) and stenciled on blank greeting cards I had from the craft store. I also used this stencil to make Jude a t-shirt.

Decorations
 I used the font "Fraulein" from dafont.com to make all the signs and labels. I printed out the words on card stock and cut them out and then glued them onto colorful scrap book paper. For the big signs, I then strung the letters together with ribbon. Easy and CUTE!
I cut gear shapes out of foam core and spray painted them sliver. These got hung up around the house and on the front door. 

For cupcake toppers, I used some really cute robot stamp on some card stock and glued them onto toothpicks. 


 Call straws "Wires" and utensils "Tools," put them in cleaned out tin cans to add to the theme!


The Robot Photo Shop
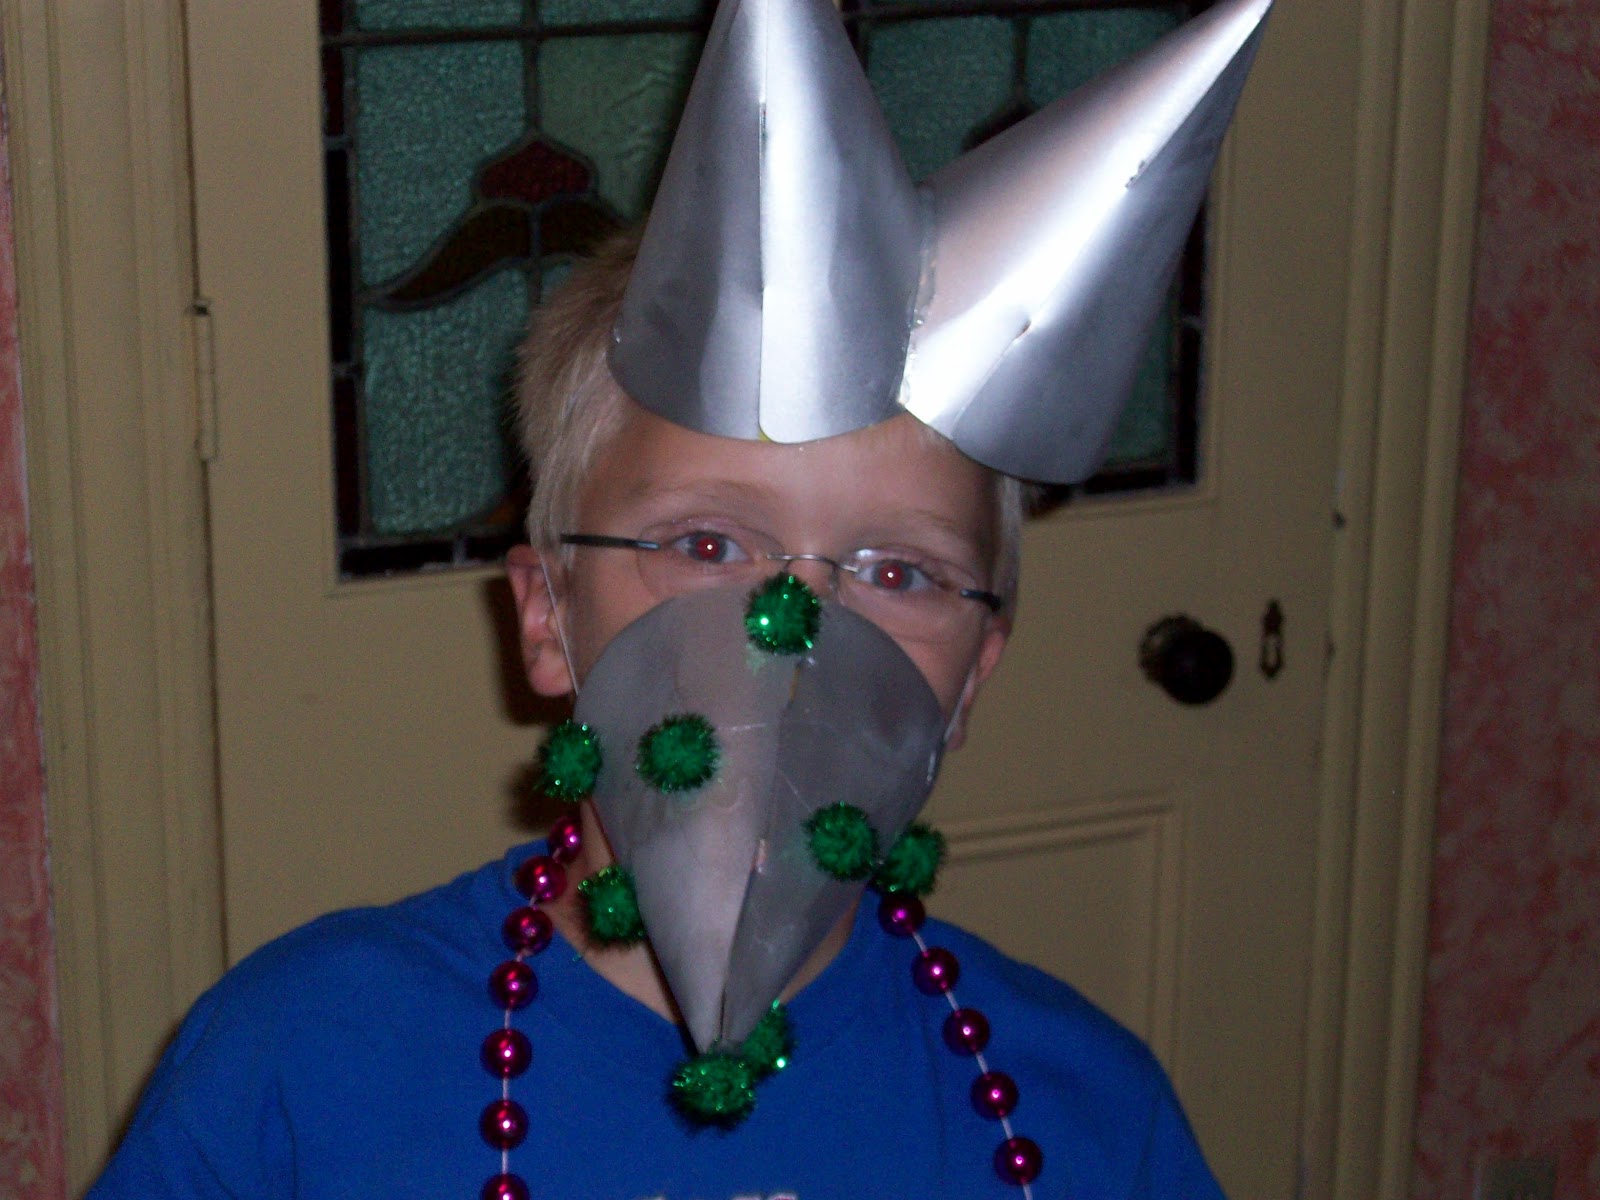
We set up a photo booth. Guest were encouraged to pull out their cameras and phones and take some silly shots! I sewed a small casing in a yard of fabric and slid a dowel through it, then I tied some ribbon around the dowel and hung it up as a backdrop. Then I put some fun props (a chalkboard, a frame, some Mardi Gras beads, a tangle of Christmas lights, a robot mask with chalkboard mouth, and some funky party hats) on a small table with a sign that said "Go ahead, grab a prop and take some pics!" 

Here are some of the results.


The Fueling Station
AKA - The food!

Atomic Chili - Regular Chili
Assorted Parts - Chili Fixin's (sour cream, cheese, hot sauce, cheese, onions, jalapenos, Fritos)
Back Up Cables - Carrots and Celery Sticks (and other veggies)
Machine Oil - Pumpkin Pie Dip (recipe link below)
Nuts and Bolts - Chex Mix
Fuse Boxes - Grapes
Battery Cells - Bacon Wrapped Dates (recipe link below)
Sprokets - Bell Pepper Strips
Computer Chips - Regular Tortilla Chips
Mechanical Munchies - Salsa and Bean Dip (recipe below)
Loose Screws - Greek Pasta Salad (recipe below)
Antifreeze - Blue Cream Soda
Frozen Robots - Robot Ice Cubes (tutorial/recipe below)
Memory Cells - Cupcakes (recipe links below)


Here are some other ideas for food:
Robot Fuel - Drinks
Motor Oil - Drinks
Cables or Wires - Licorice Whips
Shockwaves - Cupcakes
Robot Parts - Decorate Your Own Cupcakes or Make Your Own Sundaes
Robot Screws - Cheese Curls


Recipes
Pumpkin Pie Dip - Kitchen Simplicity (I added some powdered sugar and served with ginger snaps, but its super yummy with granny smith apples)
Bacon Wrapped Dates - YumSugar

Cupcakes
Gluten Free, Blueberry Cupcakes with Blueberry Cream Cheese Icing - Lemon Drop (These are so good. You would never be able to tell that they are gluten free!)
Red Velvet Cupcakes with Cream Cheese Icing - Brown Eyed Baker
Vanilla Bean Cupcakes with Vanilla Bean Icing - My Baking Addiction
# 1 Sprinkle Smash Cake Topper - kojo designs

Coco Butter Cream Recipe
Adapted from my mom's 1980's Betty Crocker Cookbook - this is my Go To chocolate icing recipe
(used to top half of the Vanilla Bean Cupcakes)

1/3 cup butter, softened
1/3 cup cocoa powder
2 cups powdered sugar
1 1/5 teaspoon vanilla extract
About 2 tablespoons milk

Cream the butter and the cocoa until smooth. Add powdered sugar and beat until smooth. Add vanilla and milk, beat until smooth. Add more milk until icing is spreading consistency.


Bean Dip Recipe
This recipe came from my dear Red Headed College Roommate

1 can re-fried beans, 32 oz. can (the big one)
1 tub sour cream , 12 oz. tub
1 packet ranch dressing mix (more or less depending on your taste)

Mix everything together in a large bowl. Chill for at least an hour. Serve with tortilla chips, Frito Scoops, or veggies.

Greek Pasta Salad Recipe

1 12 oz. box of curly bite-sized pasta (fuslli, girandole, cellentani, gemelli, etc...)
1 green bell pepper, roughly chopped (you want bigger pieces, so don't fine chop the pepper)
1 red bell pepper, roughly chopped (same note)
1 pint grape tomatoes, cut in half
1 medium cucumber, cut into bite-sized chunks
3/4 cup of Kalamata olives, cut into quarters
1, 16 oz can of chick peas, draned and rinced
1 1/2 cup feta cheese crumbles
About 1 cup (more or less according to your taste) oil and vinegar based Greek salad dressing (I used Newman's Own brand)

Cook the pasta to al dente according to the directions on the box. Mix everything together in a large bowl. Chill for at least an hour.

NOTES:
-Remember if you are making Loose Screws, you need curly pasta! Plus the curls provide a place for the dressing to rest and make the salad more flavorful
-This recipe would also be really good with salami chunks, pickled artichoke hearts, baby spinach leaves, red onion (My husband and I hate the taste of onion, so I almost never include it in my recipes), chunks of chicken
- I have made this recipe using just olive oil and balsamic or red wine vinegar as a dressing. Add some salt and pepper, garlic powder, and maybe some fresh oregano and you are good to go!


Robot Ice Cubes
Water
Food coloring

Mix food coloring and water, pour into Chillbots tray and freeze until solid. Run upside-down under hot water before carefully popping Chillbots out of tray. Be very careful when popping these little guys out of the tray, I snapped off many a little claw hand.


Wednesday, October 10, 2012

Robot 1st Birthday Party (2nd installment)


Here is some more results of Jude's birthday party!

We created a Robot Photo Shop. 
Hung up a yard of cute fabric, and made and collected some fun props (including a chalk board, a tangle of Christmas lights, a big frame, and some party hats and a robot mask with a chalkboard mouth.) 

Here are some of the great moments that happened in our Robot Photo Shop...


Sunday, October 7, 2012

Robot 1st Birthday Party (1st installment)

The great thing about first birthday parties is that you (the parent) get to do WHATEVER you want! There is no little person complaining about not getting the party that they want, its whatever you want. You can do a crazy robot theme with adult drinks and totally get away with it, because lets be real, this party is as much celebrating you getting through the first year as it is for your little sweetness.

Here is the results of my son's first birthday.

Handmade stencil.
Check out the tutorial here.

Handmade invitations. 
Made the stencils and printed the cards. They turned out so well!

Robot ice cubes!
Used the Fred & Friends Chillbots Ice Cube Tray.
It was a little difficult getting the robots to come out of the tray without breaking their legs and claw hands off, but after breaking a few batches I figured out that if I ran the tray upside-down under hot water for a few seconds the little robots popped out pretty easily. 


Tuesday, July 3, 2012

Audrey Sunglasses Case (Tutorial)


I have needed a sunglasses case for years. I generally just toss my sunglasses in my purse or beach bag and they end up getting all scratched and smudgy. And who else to grace the front of a sunglasses case than the elegant lady who wore the shades so very very well?

Here is my tutorial for the Audrey Sunglasses Case.
Enjoy.
Create.
Share.
Audrey Sunglasses Case Tutorial
What you will need:
For the case:
  • 9"x9" square of quilting cotton ("grey fabric")
  • 9"x9" square  of quilting cotton ("multi fabric")
  • 9"x9" square  thin cotton quilting batting ("batting")
  • 1" squares of male and female Velcro
  • Drinking glass or something with a round with a  2 3/4" diameter (doesn't have to be exactly 2 3/4" diameter, that's just the size I used) 
  • The Usual Stuff (sewing machine, hand sewing needle, fabric scissors, paper scissors, straight pins, matching thread, rotary cutter and mat, square ruler, etc...)


Wash and press all fabric before using (just in case it shrinks)


Cut out pieces according to the measurements, or use a rotary cutter and square ruler. (Check out this tutorial for using a rotary cutter). 


Use the drinking glass to draw a half circle in two opposing corners, about 1/2" from the edge of the fabric. This is one of those cases where you should use tailors chalk, but I found that using a pencil was much easier because I could get much closer to the edge of the glass.


Layer the grey and multi fabrics (right sides together and matching up the edges), layer the cotton batting on top of this stack. Pin.


Stitch 1/2" seam alowance around the edge and along the rounded line you drew from the drinking glass. Leave a opening for turning on the opposite edge from the curved edges and in the middle of the squares.


Trim seams to about 1/8" all the way around except the unstitched opening for turning, leave this alone.


Turn the whole thing right sides out. Press very well, making sure to press the raw opening edges to the inside.

Pin the Velcro squares 1/2" from the top of the pouch (the side with the curved edges) and roughly 3" apart. Stitch around the edges of the Velcro and in an X across the square.


This is when you should stencil on your design, skip down to the bottom of the tutorial to find instructions of making an painting a stencil.


Fold the case in half with the multi fabric on the inside. Pin along the outside edge up to where the curve starts. Make sure the raw edges of the opening are not poking out.

Stitch right along the edge of the case, starting at the bottom of the curved edge and going along to the folded edge. 


Audrey Stencil Tutorial
What you will need:
For the stencil:
  • Printer paper
  • Transparency film
  • Fine-tip marker
  • Xacto knife and blades (always use a new blade for every new project you start)
  • Self healing cutting mat
  • Paper Scissors
  • Masking tape
  • Fabric paint
  • Paint sponge

Print out the image onto regular printer paper. The image should measure roughly 4 1/2" x 4" when printed. (I printed mine onto scrap paper, that's why it has writing and other things in the background. Go green :).

Trace over the image with a marker to make sure you know where you are supposed to be cutting. 

Cut out the image and tape it to the cutting mat.

Tape a sheet of transparency film over the image. Make sure there is plenty of room around the image. I usually leave at least 3" around the image that I will be making into a stencil. That way you can be sure that there is no issues when painting. 

Use a sharp Xacto knife, cut out the area of the stencil that you colored with the marker. Continue cutting until the whole image has been cut out.


Test the stencil by placing it over a piece of scrap paper. Make sure not to brush the paint onto the stencil. Dabbing in and up and down motion is the best method. 


If you need to this is the time to make changes or slight adjustments to your stencil.


Tape your stencil in place on the case. Dab on the paint in an up and down motion. 


Remove the stencil and save for use on future projects.


A note on stencil images:
Find an image that you want to use, I chose this really great Audrey Hepburn image because it is simple and pretty much ready to go. If you want to find a different image try Googling things like "flower stencil," or "bird stencil," also using the terms "vector" or "clip art" can result in some really great stencil-ready images.

If you find an image that is not already a stencil then you will have a little more work ahead of you. It is easiest to just use images that are supposed to be stencils. If you fall in love with an image that is not already a stencil image then try to use something that is in black and white with clear lines. Remember that free floating doesn't work with stencils, there have to be connecting piece, so you may have to add these connectors.


I hope you are inspired to make your own sunglasses case. 
Let me know what you think of mine.
If you make one please share your thoughts on the tutorial and send me some pictures of your project.

Xoxo and Happy Stitching!
Corey